Giotto and Assisi Egg Yolk Painting Activity

Middle Ages Unit Study
Week 12: We made egg yolk based paints and created pictures like Giotto.

Religion was woven into life during the middle ages and both St. Francis of Assisi and Giotto played major roles. St. Francis of Assisi was the son of a prosperous merchant who lived a wealthy life until he was inspired to live a life of poverty for the Kingdom of Heaven. He gave up his worldly possessions and later founded the Franciscan Order.

The picture book Francis, the Poor Man of Assisi by Tomie de Paola told the life story of this saint in a way which kept the attention of all three of my children.

Giotto was a northern Italian painter who lived just after St. Francis at the turn of the 14th century. He was the son of a shepherd and preferred to spend his time creating pictures rather than tending the flock. Lucky for him, his talent was noted by the master Cimabue and he received excellent training.

Giotto's style was revolutionary during his time. The people he painted appeared more three dimensional and life-like than the images in the Byzantine style artwork of the past. Giotto's primary subject was religion and he adorned the walls of churches with frescos and created panel paintings using egg yolk based paint.

The picture book, A Boy Named Giotto told the life story of the great painter beginning with his childhood days as a shepherd.


This documentary gave a good explanation of the life and attributes of Giotto.

This four part series from the Khan Academy's Art History section features Giotto's work in the Arena Chapel in Padua, Italy. This small private church was completely filled with frescoes. Among them the story Mary's parents, the marriage of the virgin and the Last Supper.

 After learning about Giotto and St. Francis we followed  the activity in Discovering Great Artists: Hands-On Art for Children in the Styles of the Great Masters (Bright Ideas for Learning) to create egg yolk based paints from egg yolk, chalk and water.


First, sticks of chalk were crushed into powders.

Next an egg yolk and 2 tbsp of water were beaten with a fork until bubbly. This took about 10 minutes.

Then a spoon full of egg yolk mixture was added to each color of powdered chalk.


The kids were astounded to learn that paint could be created this way. Once they began painting they commented how it was just like using regular paints.

I was pleased that the colors came out so bright.


This post is linked to some great blog hops.

* I did not receive any compensation for this recommendation. I'm just a homeschooling mom who has found many products that I like. If you're interested in the products I recommend on this blog I want to make it easy for you to find them. 
** I am an Amazon associate and receive a small portion of the sales on orders made after clicking in from this site, which I promptly spend on homeschooling books and supplies for my children.

What type of seed do birds like best?

We created four different types of seeded peanut butter pine cones to find what type of seed the birds prefer.

Most science fair projects are discovery based and follow the scientific method. Instead of creating a scientific model to explain a concept, science fair projects answer a question through experimentation. Therefore, this project is perfect for science fairs. It is simple, interesting and discovery based.

 After gathering pine cones, my son generously slathered them with peanut butter.

Then they were rolled in sunflower seeds, sesame seeds, flax seeds and millet seeds. The birds in our area preferred the sunflower seeds. What type of seed do your neighborhood birds prefer?


Onomatopoeia Free Writing Time with Kids

We did an onomatopoeia free write.

If kids are exposed to nursery rhymes and songs they learn onomatopoeia from birth.

This little pig went to market,
This little pig stayed home,
This little pig had roast beef,
This little pig had none,
And this little piggy cried wee-wee-wee all the way home

Last week we did an onomatopoeia poetry lesson and this week we continued with the theme by doing an onomatopoeia free write. - Brave Writer has so many great ideas!

First we searched for more poems which included onomatopoeia and they weren't difficult to find. There are several concerning rain such as The Umbrella Brigade by Laura E Richards and Drums of the Rain by Mary Carolyn Davies.

The sounds in Galoshes by Rhoda W. Bacmeister transports the reader to a late winter day.

Susie's galoshes
Make splishes and sploshes
And slooshes and sloshes,
As Susie steps slowly
Along in the slush.

They stamp and they tramp
On the ice and concrete,
They get stuck in the muck and the mud;
But Susie likes much best to hear

The slippery slush
As it slooshes and sloshes,
And splishes and sploshes,
All round her galoshes!

Onomatopoeia comes is stories too. Ty's One-Man Band by Mildred Pitts Walter begins with a step-th-hump, step-th-hump, step-th-hump as a musical man walks into the fields. He turns out to have a wooden leg and a great talent for making music with spoons, washboards and combs.

The kids took special note of the puffa-puffa-stick-stick of Jan Brett's hedgehog in Hedgie's Surprise.

After the stories we went outside and began listening and writing.

The goal of this activity was simply to write down sounds we heard. By practicing writing this way, writing descriptions of sound should pop into stories much more naturally.

Here are some of the results:

From my 10 year old son
Tweet, tweet - a bird
"I want to be alone here."
crash - a something
rrrrrr - a plane
shhhhhhh - a car
cock-a-doodle-doo - a rooster
whooshhhhh - the wind
quack, quack - a duck
woof, woof - a dog
growl - a dog
ttttttttt - a hammer
wewuuuuuuuu - construction
tssss-ssss-ssss - a broom

A portion of my free write - I think it's important to work along side the kids as it both helps my writing and encourages them by example.

The rumbling airplane drowns the tweeting of birds. Some say chirp-ch-ch chirp and others chir-ip, chir-ip and ch rrr rrr rrrp. The geese gobble, gobble honking across the creek. One noisy one is busy repeating his song as the construction worker chuckles. An excited fowl g-g-g-gobbles in answer to the repeating honker.

An occasional car swishes by and the ki-ki-re-key of the German rooster sounds again and again. Spring is in the air as the old man across the street sweeps the sidewalk and people walking past wave "hello". A duck quacks and the excited frog croaks rib-rib rib-rib. Woof, woof, oooohhhh sounds the dog wanting to get out.


For more educational activities be sure to visit our subject based pages and sign-up to follow Highhill Education by email below.
Enter your email address:


Delivered by FeedBurner


Drawing from Photos - Perspective

We practiced perspective drawing by creating drawings based on photos.

Drawing one point city view perspective drawings proved to be a challenging activity. Before moving onto vanishing points in different locations and drawings with more than one vanishing point, we practiced what we have learned so far.

First, I looked through many photos and selected several that had either roads, paths or canals vanishing into the background at a point near the center. Then the kids each selected a photo to use as a base for a drawing.

 My 10 year old son selected this photo, but wanted a tropical climate.

He drew the path and fence, but then changed the northern deciduous trees to palm trees.

My 12 year old daughter selected this photo in which the path vanishes into a tunnel in the side of the hill.


Venice was such a picturesque city, that I selected a scene from there. Art is not my strong point, so I'm learning along with the kids.

Please stay tuned to Highhill Education as many more entertaining and educational activity posts are planned for the summer.

Eating Flowers

When we were in Turkey we saw fields of artichokes. Unfortunately the view was from a tour bus window. I would have liked a closer look.

Stems, roots, flowers, leaves and seeds are all different parts of plants that are commonly eaten. We've spent a week eating specific parts of vegetables. It's a simple and fun way for kids to learn different plant parts. This week we focused on flowers and prepared artichokes. Cauliflower and broccoli were also possibilities, but since we eat them often artichokes seemed like more fun.


I steamed them in water until the petals could be easily removed and then we scraped off the flesh with our teeth.


Tropical Rain Forest Project for Kids

Earth Science Unit Study

Week 12: We made two different types of hygrometers to measure humidity.

Tropical rain forests are the most inhabited places on the planet. Plants thrive in the hot, humid and wet environment providing an abundance of food for animals.


The video Living Planet - Jungle provides glimpses of many unique plants and animals of the rain forest including native tribe who have learned to live in the unusual environment.

Rain Forest Books
Welcome to the Green House by Jane Yolen is a picture book of the rain forest good for young children. After watching the video the kids were excited to recognize many plants and animals in the story.

Generally my children shun non-fiction books in favor of stories, but they did enjoy Rainforest Babies. Each page detailed a different rain forest animal with interesting information. They were fascinated by the frogs so poisonous they could kill an entire village. Did you know chameleons weren't born knowing how to change color? They learn it like we learn to walk, and they communicate through color.

In the Rain Forest: A Book about Rain Forest Ecology (Magic School Bus) is a book my kids loved even before it was opened. As the kids journey through the rain forest they learn where chocolate comes from and see many plants and animals.

Rain Forest Maps
Most rain forests are located near the equator, so we printed world maps and labeled the  rainforests.

Hygrometers
Since rain is essential to life in the rain forest, we made two different hygrometers to measure humidity. Both projects came from the book Janice VanCleave's A+ Projects in Earth Science: Winning Experiments for Science Fairs and Extra Credit.

The first type of hygrometer was constructed using two short pencils, two glass jars, two empty spools of thread, newspaper, aluminum foil, and tape.

Two of the first type of hygrometers were created. One was to be placed in a dry environment and the other in a humid environment. That way it was possible to see how a hygrometer would look in different situations.

A strip of newspaper was cut and taped to a slightly larger strip of aluminum foil, and then coiled around one of the pencils. The pencil was stuck into the spool to enable it to stand up, and placed in one jar.

The set-up was repeated for the second jar.

While one jar was dried out with a hair dryer, a bit of warm water was placed in the other.

After the hygrometers had time to adjust to their environment, the one in the humid environment was coiled looser than the one in the dry environment. As the newspaper absorbed water, the paper pushed against the foil causing it to unwind.


Once the hygrometers came to equilibrium in their jars, the lids were removed so they could be viewed moving once again. By letting them sit with their lids off, changes from day to day were slightly visible.
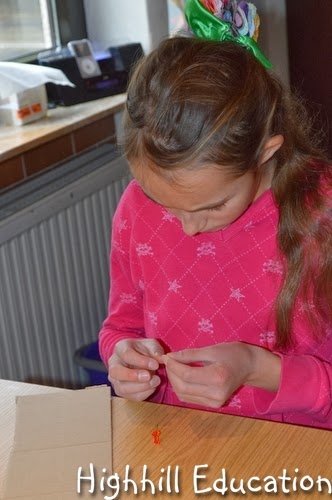
Hygrometer #2
The second hygrometer involved tying a strand of hair to a thumb tack and an indicator. As the humidity in the air changed, the length of the strand of hair changed too.

The hair was attached to one thumb tack, and the hole punched in the triangular indicator. Next the hair was stretched tight and the indicator was tacked down to the cardboard so that it could rotate as it's length changed due to the humidity. A line was marked to show the initial position of the indicator. The following day when the humidity dropped from 85% to 60%, the indicator pointed to a line slightly higher than the original line.

In doing this project, my son was shocked to learn that his hair changes length in accordance with the weather.


* I did not receive any compensation for this recommendation. I'm just a homeschooling mom who has found many products that I like. If you're interested in the products I recommend on this blog I want to make it easy for you to find them. 
** I am an Amazon associate and receive a small portion of the sales on orders made after clicking in from this site, which I promptly spend on homeschooling books and supplies for my children.

Middle Ages Unit - King Arthur, Knights and Ladies

Week 11: We learned about King Arthur and made personal pennants.

King Arthur was the ideal ruler. His knights had equal status at the round table, he pulled the sword from the stone and talked with the lady in the lake. Each knight has his own story filled with conflict, ladies and battles.

When Christianity flourished in Northern Europe, the cultures of the Celtic people blended with the Roman traditions, Vikings and other ancient people giving birth to the legends of King Arthur. Perhaps the legends are based upon a real person. General Arthur united the people of Brittan and led the fight against William the Conqueror of Normandy.

Geoffry of Monmouth, the original author of the King Arthur legends, translated books and read the entire collection of Celtic legends kept in the library. There is a lot in common between King Arthur legends and the Celtic Myths. It was a Celtic custom to discard weapons in water.

Although there are many tales of King Arthur and his Knights, we chose to read only a few.
The Kitchen Knight: A Tale of King Arthur was a picture book about King Arthur's Knight Sir Gareth of Orkney. My 6 and 9 year olds enjoyed it as a bedtime story one night.

Of Swords and Sorcerers contained several short stories of King Arthur and his knights. A good book for upper elementary.

The Story of King Arthur and His Knights (Sterling Unabridged Classics) was read independently by my 12 year old and I hope to get to it with my younger two in the future.

In the middle ages colors had meaning and so did animals. Colors, animals and other symbols displayed on coats of arms were family symbols of the middle ages. These family symbols were put onto shields and carried into battle, woven into fabric flags used for decoration, and sewn into pennants which were mounted on lances. Sometimes symbols from different families would be joined together into one new coat of arms after marriage or birth of a child.

Red symbolized fierceness
Green symbolized hope and youth
Purple symbolized justice and royalty
Blue symbolized strength and loyalty
Black symbolized sadness and misfortune
Gold symbolized generosity
Silver symbolized sincerity and peace


Lion - courage
Bear - fierce protector
Eagle - noble protector
Fox - wise
Wolf - persistent
Griffin - courage
Dragon - courage
Swan - poetical and musical

Our pennants were constructed from a triangular piece of felt fabric colored with permanent markers. The children enjoyed this very simple project as they were able to use their own creativity.


Our other Middle Ages Unit Study posts can be found on our History Page.


This post is linked to some of these blog hops.

* I did not receive any compensation for this recommendation. I'm just a homeschooling mom who has found many products that I like. If you're interested in the products I recommend on this blog I want to make it easy for you to find them. 
** I am an Amazon associate and receive a small portion of the sales on orders made after clicking in from this site, which I promptly spend on homeschooling books and supplies for my children.
Related Posts Plugin for WordPress, Blogger...