Stained Glass Window Project - Charlemagne

Week 4: We learned about Charlemagne and made stained glass windows.

To learn about Charlemagne, we watched the two following short videos from the Khan Academy.


Charlemagne was a bit of a Renaissance man way before the time of the Renaissance. He united the Frankish tribes of France, Germany and northern Italy, promoted literacy, worked to build a system of government and was crowned emperor by the Pope. He was deeply religious and insisted on religious conversion. He built his capitol city at Aachen, Germany which is located just north of Luxembourg near the boarder of Belgium and the Netherlands. Although his palace no longer exists, the remains of his chapel have been incorporated into the Palatine Chapel.

In conjunction with our Charlemagne study, we made stained glass windows. The idea for the project came from the book Medieval Projects You Can Do! (Medieval World) which contains approximately 10 simple activities for kids.

Materials:
Black Construction Paper
Glue
Scissors
Wax Paper
Iron
Crayon Shavings
The first step was to cut an open rectangle from the construction paper to serve as the boarder.

The kids drew designs with large shapes on plain paper and then created strips of black from the construction paper matching each line in their drawings.


The designs needed to be attached to the frame, so if their designs didn't touch the edge, additional bars were created to make the connection.

Using ground up pieces of crayon of solid colors, the glass was created by ironing pieces between to sheets of wax paper.

Each sheet melted differently and it was interesting watching the colors run.

Next, small pieces of waxed paper were cut to be placed over each opening.

Here's a back view.


Two Butterflies

A Hedgehog

Dorothy Walking Down the Yellow Brick Road


This post is linked to: 
True Aim Education

* I did not receive any compensation for this recommendation. I'm just a homeschooling mom who has found many products that I like. If you're interested in the products I recommend on this blog I want to make it easy for you to find them. 
** I am an Amazon associate and receive a small portion of the sales on orders made after clicking in from this site, which I promptly spend on homeschooling books and supplies for my children.

Hedgehog Books

Hedgehogs are something of a novelty here in Europe and my kids are obsessed with them. Luckily there are many wonderful books which feature a hedgehog for a main character. Through these stories they have learned more about the behaviors of hedgehogs and enjoyed some well written books.


Hans My Hedgehog: A Tale from the Brothers Grimm is a retelling of a classic tale. A child which is half-man and half-hedgehog grows up as a bit of an outcast. But just like Beauty, the hedgehog man turns into a handsome prince upon finding love. In this version, many of the original details were changed which gives the story a much more positive tone than the original.

The Tale of Mrs. Tiggy-Winkle (Peter Rabbit) - Mrs. Tiggy-Winkle is a washer woman who does laundry for all the forest creatures. This is a sweet story which contains many sophisticated words that help to build little vocabularies.

The Beginning of the Armadillos by Rudyard Kipling is a legend which explains how armadillos came to be. When the fox tried to capture a hedgehog and a tortoise, he got confused about who was who. As he straightens himself out the hedgehog and tortoise learn each others tricks and slowly change form.

Hedgie's Surprise by Jan Brett tells the story of a Tomten who likes to eat eggs for breakfast. When the hen gets fed-up, Hedgie helps the Tomten to stop taking the hen's eggs with a trick. Many of Jan Brett's books feature hedgehogs, but this one is our favorite.

When the hedgehog in Miss Jaster's Garden is sprinkled with seeds his skin begins to itch. He ponders whether he will become a vegetable or flower garden before leaving the garden to do a dance. Miss Jaster sees her flowers leaving and Hedgie is mistaken for a thief. Luckily the police officer straightens out the situation. 

Hedgehog, The (Eye View Library S.) contained far more information on the habits of hedgehogs than any of the other stories. Written in story format, I recommend this book with one bit of caution. It describes how the male hedgehog runs in circles around the female for three hours before she allows him to mate. Some find this page too graphic for little ones.

Knitting a hedgehog is a fun project to go along with these stories.


This post is linked to: 
True Aim Education

* I did not receive any compensation for this recommendation. I'm just a homeschooling mom who has found many products that I like. If you're interested in the products I recommend on this blog I want to make it easy for you to find them. 
** I am an Amazon associate and receive a small portion of the sales on orders made after clicking in from this site, which I promptly spend on homeschooling books and supplies for my children.

Simple Fabric-Yarn Doll Tutorial

These dolls are actually quite simple to make, and aside from the pants the boy is wearing, no sewing is required.

Materials
White or Skin Colored Fabric
Ball of Yarn
Cotton or Scraps to Stuff Head
Scissors
Clothing Fabric
Glue Gun (Optional)

Cut the fabric into a 12 inch square. Fold it in half. (Fold is at top in photo). Cut a slit down the center approximately 4 inches long. Cut slits approximately 3 inches long 1.25 inches below fold.

Fold up the fabric and mark with X's and O's as shown in the picture. The X's will be joined together to form one leg and the O's will be joined together to form the other leg after the head is formed.

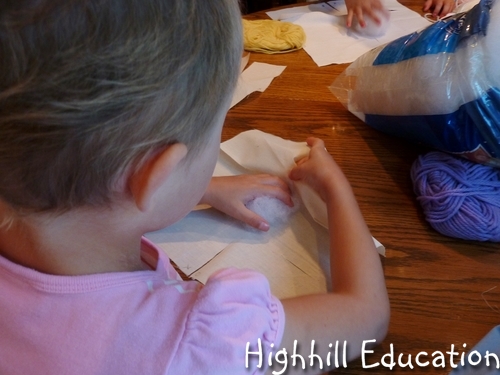
Place a small ball of cotton in the middle of the fabric to form the head.

Fold the fabric around the head and tie a knot in the yarn around the neck.

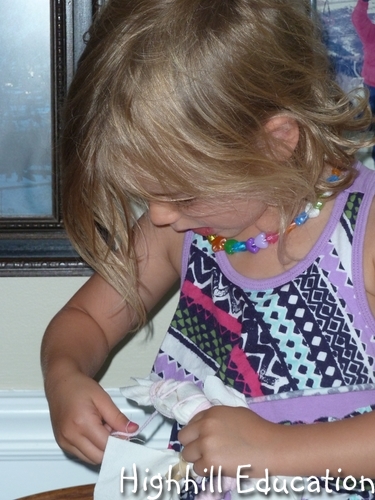
Find the pieces marked with X's and O's and join them together to become legs. Place rubber bands around the legs if desired. Pull out two fabric pieces to become arms.

Begin wrapping yarn around one of the arms.

Continue wrapping yarn until the hand is reached.

At the hand begin wrapping the yarn back up the arm. At the armpit wrap the yarn around the neck a few times and then wrap down and back around the other arm.

Once both arms are wrapped, wrap yarn in an X shape around the middle.

Wrap down and up each leg. Then wrap yarn around the tops of both legs together to form the belly.

One common problem is the yarn unravelling at the foot or hand. To prevent this leave plenty of fabric for the hands and feet.

Another way to prevent this problem is to dab a little glue on the hands and feet with a glue gun.
If the yarn has already unravelled, consider placing a cast on the doll.

The clothes can be made with a rectangular piece of fabric with a hole in the center for the head and a piece of yarn or ribbon for the belt. The edges of this fabric were sewn to prevent unravelling of the fabric. Using felt or fleece would prevent the need to sew.

To create the hat cut a triangular piece of fabric and tie it in a knot at the back of the head.


To sew the boys pants cut a square  piece of fabric, put a casing in the top with a string or strip of elastic and cut a slit and sew it up to form the legs.

To see our other craft activities please visit our Craft Page.

Using Speed! with Cuisenaire Rods

We built rectangles using two different colors of Cuisenaire Rods and then used skip-counting with a third color to determine how many square units were in each rectangle.

Since Speed! is a skip-counting game and Cuisenaire Rods are a math manipulative, they go great together.

The blue Cuisenaire Rods are 9 cm long and the white rods are 1 cm long.
The first rectangle consisted of eight blues and eight whites.

Since the total of a white and a blue is 10 cm, the number of square units in this rectangle was easy to calculate (8 x 10 = 80).


When the 4 cm purple rods and the 5 cm yellow rods were combined into 9 cm rods, the number of square units was more difficult to determine.

Eight rows of 9 cm lengths were used in the rectangle.


Using the Speed! cards was a unique way to determine the unit area.

On the back of box and the front of each card a visual representation of the skip-counting number chain including numbers is shown.

9 x 9 = 81 = 9 x 4 + 9 x 5 = 36 + 45

The Nine Speed deck was used to look up the 81, the Four Speed deck was used to look up the 36 and the Five Speed deck was used to look up the 45. After my daughter added 36 and 45 she was excited to learn the unit area could be determined two different ways.

Cuisenaire Rods are a great math manipulate especially for children who need to figure out concepts in order to understand and retain them and Speed! is a great companion.


* I did not receive any compensation for this recommendation (Cuisenaire Rods). I'm just a homeschooling mom who has found many products that I like. If you're interested in the products I recommend on this blog I want to make it easy for you to find them. 
** I am an Amazon associate and receive a small portion of the sales on orders made after clicking in from this site, which I promptly spend on homeschooling books and supplies for my children. 
*** Highhill Educational Supplies is my company. I am the creator of the game Speed!
Related Posts Plugin for WordPress, Blogger...