Books for Kids - Norway

This is a list of books for children with connections to Norway. They greatly enhance a Norwegian Geography Unit Study and compliment a trip to Norway.

The Vikings were once the sailors and rulers of the northern lands. In Oslo, Norway there is a museum which displays several Viking ships and artifacts. The Vikings had their own gods whose stories are told in Norse Myths.

Leif the Lucky by Ingri D’Aulaire is an outstanding picture book that tells the journey of Leif Erikson. Leif son of Erik the Red lived in Greenland and traveled to North America. The story tells of feasts, travelers, and Kings during the Viking times. This book is best for age 7 and up.

Viking Adventure by Clyde Robert Bulla tells the story of Sigurd, a Viking boy who leaves home to go on an adventure to Vineland. Readers learn much about Viking way of life through this wonderfully entertaining story best for ages 8 and up.

Viking Tales by Jeannie Hall is a book written in two parts. The first part tells the story of King Harald, the first Viking King. The second part tells the story of Erik the Red and Leif Erikson and their journeys to new lands. It is best for ages 9 and up. If you want to check out this book it is free on the internet: http://www.gutenberg.org

D’Aulaire’s Book of Norse Myths is a wonderful introduction to Norse Mythology. The Norse was the name given to the people who were descended from the Vikings and lived in Scandinavian lands. This book starts at the beginning of the story of Norse Mythology by explaining a bit about each god before telling his/her story. After reading about the beliefs of the Norsemen, Norwegian artwork is sure to have more meaning.

Snow Treasure by Marie McSwigan is a Norwegian story set during World War II. In the story school children help smuggle away the cities treasure and save it from falling into the hands of the Nazis. The story is best for ages 8 and up.
 Kon Tiki by Thor Heyerdahl is the story of an amazing journey across the Pacific Ocean. The leader of the expedition was Thor Heyerdahl from Norway. In Oslo, Norway there is a museum which displays the Kon Tiki vessel used in the expedition, as well as information and vessels from Heyerdahl’s other expeditions. This book is best enjoyed by older children ages 12 to adults.


* I did not receive any compensation for this recommendation. I'm just a homeschooling mom who has found many products that I like. If you're interested in the products I recommend on this blog I want to make it easy for you to find them. 
 ** I am an Amazon associate and receive a small portion of the sales on orders made after clicking in from this site, which I promptly spend on homeschooling books and supplies for my children.

Paul Klee Building Project for Kids

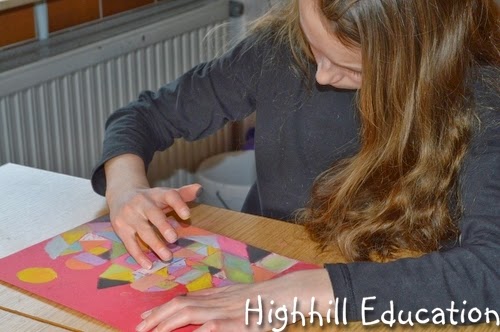
We used simple shapes to create city building pictures like the artist Paul Klee.

Although many of Paul Klee's drawing appear simple, he spent a lot of time studying the mathematics behind his artwork. The simplicity makes the artwork ideal for children to imitate. For example, the geometric shapes in his city scape drawing, provide a perfect opportunity for pre-schoolers and young children to explore shapes while creating art.

Although the project was altered slightly, the basic idea came from the DK book My Art Book.

First, we gathered the squares, rectangles, triangles, parallelograms, and circles from a puzzle kit. Cardboard works just as well.

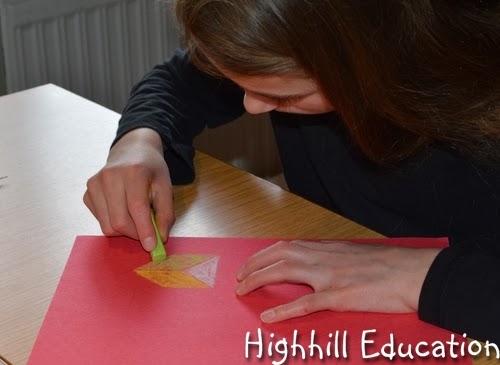
Next, beginning at the bottom of the paper, the shapes were traced.

After the paper was filled, the shapes were colored with chalk pastels making sure that no two adjacent shapes shared the same color.

Finally additional chalk was added to a few shapes and they colors were smeared together.


12 year old daughter

My drawing

10 year old son

7 year old daughter


How to make an Icosahedron

We made three different paper icosahedrons.

An icosahedron is a three dimensional object with twenty triangular faces. The triangles meet together in groups of five to form a solid. It is one of the five Platonic Solids.

Magna Tiles are a magnetic children's building toy. Since the set contains over 20 equilateral triangles, the first attempt to create an icosahedron was done using the Magna Tiles.

Unfortunately, they needed more internal support, and collapsed each time before the icosahedron could be closed.

Simple Paper Icosahedron

The second and more successful attempt was made using paper. Twenty connected equilateral triangles were sketched on the paper. In addition, several tabs were left on the triangles to facilitate assembly.

 The triangles were cut as one piece, and the paper was folded on the lines.

Once the icosahedron was closed with a small amount of glue it worked much better.

Twenty-Point Star Icosahedron

Although, at first glance, a twenty-point star may not look like an icosahedron, the base shape is indeed an icosahedron. If flat faces replaced the points of the star, it would look like the blue icosahedron above. The twenty-point star project was more challenging than the the blue icosahedron, but definitely worth the extra effort.

Small Triambic Icosahedron

Similarly, this origami small triambic icosahedron has points in groups of five for a total of 20 smaller points.


Ground Water Activity

Earth Science Unit Study

Week 21: We did a simple activity to demonstrate how ground water is sometimes absorbed into the ground and sometimes runs off in rivers.


In connection with our Earth Science study we read the book Rocks, rivers & the changing earth,: A first book about geology. Written in story format from a scientific perspective, it is an entertaining book which explains how the earth works to young children.

Water flows in a continuous cycle throughout our world. Water that falls onto mountains runs down the side into streams, which flow into rivers that run into lakes and seas. Eventually water is evaporated back into the air, rises, and falls as rain again.

The River by Bernadette Watts is a beautiful picture book which follows water as it trickles from a mountain rock and flows to the sea. Near the beginning, five pine cones fall into the water and wonder where it will take them. Each ends in a different place----- will it be near a meandering stream, a mountain lake or another watery place?

Sometimes after a rain the creeks, streams and rivers are full and other times after a similar rain they flow at low levels. The difference depends on how wet the ground is. If it's full of water, or saturated, to begin with, the additional water from the rain flows down, but if the ground is dry, it can be absorbed.

To demonstrate the difference we placed two dry washcloths, to represent dry ground, on top of an upside bowl, to represent a mountain.

Then it began to "rain".

As the ground (or washcloths) became saturated rivers began to form and run down the mountain.
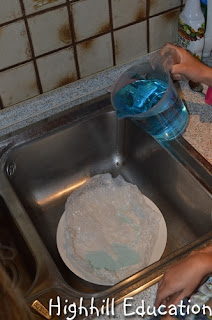
The process was repeated several times.

More of our hands-on science activities can be found on our Science Page.


For more educational ideas check out these blog hops.

* I did not receive any compensation for this recommendation. I'm just a homeschooling mom who has found many products that I like. If you're interested in the products I recommend on this blog I want to make it easy for you to find them. 
** I am an Amazon associate and receive a small portion of the sales on orders made after clicking in from this site, which I promptly spend on homeschooling books and supplies for my children.

Secret Codes of the Middle Ages

Middle Ages Unit Study
Week 20: We made a secret code and sent secret messages.

The middle ages were full of secret messages and secret codes. One way secret messages were sent throughout history was to tattoo a message onto someone's head, send them to the recipient who shaved their head to read the message. Another way was to carve a message into the wood which held a wax tablet. Once the wax was removed the message could be read.

Graffiti was the monk's word for secret codes. Sometimes secret messages were sent by mixing cursive and print type faces. The message could be read by only reading the cursive letters. Writing letters in a grid and using column and row numbers to refer to boxes in a grid, shifting the alphabet a certain number of characters or using symbols instead of letters are all ways to create codes.

Lu and Clancy's Secret Codes book is a fun way to introduce kids to codes.

We used wheels to create secret alphabet shift codes.

A=>X
B=>Y
C=>=Z
D=>A
E=>B
F=>C
G=>D
H=>E
I=>F
J=>G
K=>H
L=>I
M=>J
N=>K
O=>L
P=>M
Q=>N
R=>O
S=>P
T=>Q
U=>R
V=>S
W=>T
X=>U
Y=>V
Z=>W

Two circles with the alphabet written around the perimeter were cut from a sheet of paper. The larger circle was glued to cardboard. The smaller circle was placed on top and a brad was punched through the center of the circles to attach them together while allowing them to spin.

The wheel was used to create and decipher secret codes.

To create and decipher the secret code only the number of characters of the shift was required. Here are a few secret messages written with a shift of 4 letters.

EBADFB XQB ZXHB CLO IRKZE

JV EBXOQ YBILKDP QL AXAAV

F ILSB PBZOBQ ZOABP


For more educational ideas check out these blog hops.

Fine Art Detective

We looked at forged fine artwork and solved a crime.

Art Fraud Detective: Spot the Difference, Solve the Crime!is a sort of I Spy book of fine art, but better. The book contains 32 works of art along with a brief explanation of each piece.


Readers compare museum pieces on the top of the pages, with original photographs from the museum's catalog on the bottom of the pages, to find differences. Each work of art has up to four differences as well as a fish, bird, star or tree identifying the gang who created the forgery.

There are four forgers in each gang who created two false paintings each, and four gangs in all resulting in the 32 works of art in the book. One gang member is a good guy/gal and did not create any forgeries.

By closely looking at each picture, readers can identify the good guy/gal as well as four works of art which were not forged.

The kids were very motivated to find the original works of art and solve the crime.


For more educational ideas check out these blog hops.

* I did not receive any compensation for this recommendation. I'm just a homeschooling mom who has found many products that I like. If you're interested in the products I recommend on this blog I want to make it easy for you to find them. 
** I am an Amazon associate and receive a small portion of the sales on orders made after clicking in from this site, which I promptly spend on homeschooling books and supplies for my children.

Paul Klee - Person from one Line - Art Project for Kids

We created pictures similar to Paul Klee's The Groom's Arrival.

Paul Klee was a European abstract artist who lived at the same time as Wassily Kandinsky in the late 1800's and early 1900's. Much of his art is very childlike and therefore easy to imitate. He loved bright colors and simple shapes.

The Groom's Arrival looks like it was created with one long continuous like plus a few circles and ovals. Inspired by Art Projects for Kids, we used the same technique to create pictures of people.

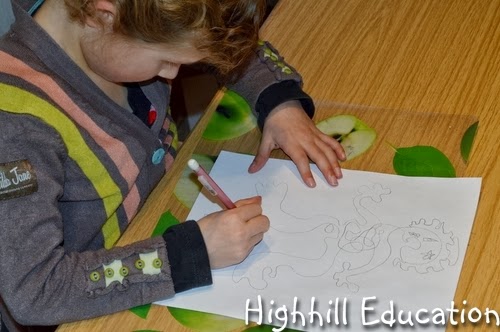
One continuous line was drawn to create the figure of a person.

A few simple shapes were added to complete the sketch. Then some were outlined with black marker and the shapes were filled in with oil pastels.

Daughter age 7 years

Daughter age 12 years

Mom age XX years

In conjunction with creating Paul Klee drawings, we read the book Paul Klee (Getting to Know the World's Greatest Artists). I highly recommend this artist/musician series.


This is the first post in a three project series imitating the art of Paul Klee.


For more educational ideas check out these blog hops.

* I did not receive any compensation for this recommendation. I'm just a homeschooling mom who has found many products that I like. If you're interested in the products I recommend on this blog I want to make it easy for you to find them. 
** I am an Amazon associate and receive a small portion of the sales on orders made after clicking in from this site, which I promptly spend on homeschooling books and supplies for my children.

Math Designed to Make Kids Think

I have posted several math problems designed to invoke thinking, on the refrigerator with out saying a word. The kids are enjoying it thoroughly.


Each sheet remains up for 3-6 days while everyone has a chance to ponder, explore and write down their thoughts and solutions.

Here's what's being posted.
Algebra on Rectangles from Let's Play Math and Math Pickle
Visual Patterns from Let's Play Math and VisualPatterns.org
Math Without Words from James Tanton (this website also contains many excellent videos)
Pondering Large Numbers from Let's Play Math
How many ways can you make 12? - from a homeschooling mom on a Math message board

Those are the ideas I have so far. If you have any suggestions I would love a comment.
For more educational ideas check out these blog hops.

How do rivers flow when it doesn't rain?

Earth Science Unit Study

Week 20: We did an experiment to show how rivers flow when it doesn't rain.

Water always flows down hill. On it's way to the ocean water may flow over a water fall, through a canyon, or into a delta. When it rains, much water seeps into the ground where it is stored. If the ground is saturated, after the rain, some water continues to trickle out of the ground and flow into streams. If the ground can hold the water, additional water is not released. That's why sometimes rivers dry up during periods with no rain, but other rivers continue to flow.


We have been using the book Rocks, rivers & the changing earth,: A first book about geology as a reference. It is a chapter book, written in story format, and packed with experiments that have to do with Earth Science. In addition, the book Geography from A to Z: A Picture Glossary (Trophy Picture Books) gives simple definitions of different land and water forms. By repeating this simple experiment waterfall, river, delta, lake and island among others were visible.
 
To demonstrate how water always flows down hill and how it flows during periods without rain we used a washcloth to represent the ground, a plate to represent the hill, a crumpled up sheet of wax paper so the ground wasn't smooth, some water and a few drops of food coloring.

The wax paper was placed on a plate resting in a tilted position. Water was poured onto the upper end of the plate and the flow of the water was observed.

 Here it formed a river.

After adding more water a lake was formed at the base of the river.

The wax paper was repositioned and the experiment was repeated several times. In this version the water formed several waterfalls.

 In this photo, the water formed a lake which split in two to reach the sea. - A Delta

Next the washcloth was added to the top of the hill to allow the ground to soak up the water.

When the rain ceased, the rivers continued to flow.


For more educational ideas check out these blog hops.


* I did not receive any compensation for this recommendation. I'm just a homeschooling mom who has found many products that I like. If you're interested in the products I recommend on this blog I want to make it easy for you to find them. 
** I am an Amazon associate and receive a small portion of the sales on orders made after clicking in from this site, which I promptly spend on homeschooling books and supplies for my children.
Related Posts Plugin for WordPress, Blogger...