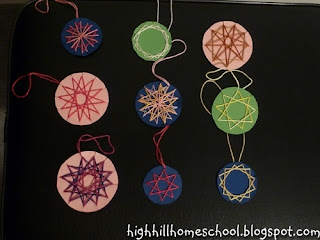
First we used a compass to draw a circle on a piece of heavy card stock paper.
Next we selected a number between three and sixteen and marked that number of evenly spaced marks around the perimeter of the circle. This was a challenging estimation skill and my older daughter understood that 360 degrees in a circle divided by the number of marks will gave the number of degrees between each mark.
For example, when she made eight marks there were 45 degrees between each mark. 360/8=45.
After we had the marks we cut into the paper a small amount with scissors on each mark to create a slit.
Embroidery floss was used to create the star patterns. A piece roughly 2.5 feet long was required depending upon the number of marks and diameter of the circle. Cutting floss roughly 2.5 feet long was a simple estimation activity.
The embroidery floss was taped to the back of the circle then wound around to create stars.
The kids selected a number between one and a number smaller than the number of marks on their star. Then they counted that many slots and strung the floss through that slot. They kept winding until a star pattern appeared.
In some cases they added a second color to create more than one star. Different combinations give different patterns, and some don't create stars.
This activity was addicting for my eleven year old daughter because she quickly decided she wanted to see all the combinations. Each time a new star appeared she was delighted.
Sign-up to follow Highhill Education by email below.


This is fascinating and very timely for this time of the year! I'll bookmark it for later. Thanks for sharing!
ReplyDeleteYes. We did it last year, but it was too close to Christmas to post, so I had to wait a year until it made sense. :)
DeleteSo did your daughter discover all possible combinations? ;) I love how some of your ornaments turned out - thanks for sharing with Afterschool!
ReplyDeleteI think when more than one color and pattern is used at the same time the possibilities are infinite.
Delete