Showing posts with label knitting. Show all posts

Knitting - Interested Based Education


We constantly shift our daily routines between various degrees of interest based education and loosely structured basic requirements. During our last adventure moving toward interest based education I constantly worked to ensure my children were growing in their knowledge of their areas of interest.

A few years ago my youngest learned to knit around the age of five years old with a peg loom. She went on to both crochet and knit herself hats. After she made a second knit hat identical to her first I was hoping she would be interested in another knitting project which was slightly more difficult.

I was in luck. All I had to do was suggest she search the internet for fancy hats. She giggled as she looked, but then chose a very appropriate hat to increase her knowledge and continue her knitting.


After finding the hat she wanted to make she chose her yarn.

While she was selecting yarn, I worked to write down a pattern for her to follow. We talked about the Fibonacci numbers as they are useful in designing stripes. In addition, we counted the number of rows in her hat and how many rows of each color were to be knitted, which involved lots of addition and subtraction.

This project was perfect because she worked on it several days in a row while sick with a fever, was able to read the directions on her own, and able to see how math is involved in pattern creation. It is always interesting to see where kids go when they are given the freedom to explore.

For more great educational activities check out these blog hops.

Mock Cable Chunky Yarn Hat

Although this hat appears to have cables, it actually does not. This chunky yarn hat was inspired by a pattern in the book One-Skein Wonders. It was super easy and knitted up in a short amount of time. The pattern in the book required thinner yarn and smaller needles. Since I planned to use chunky yarn with #10-16 needles, modifications were required.

To begin 90 stitches were cast on. This seems like a lot of stitches for a chunky yarn hat with number 10 needles, but each time a round 1 (detailed below) was completed, the number of stitches were reduced to 72. 

A series of slipped then passed over stitches coupled with yarn overs were used to achieve the cabled look without using a cable needle. The simple basic pattern of the hat was repeated over five stitches in groups of four rows;

round 1 - slip 1, k2, psso, p2
round 2 - k1, yo, k1, p2
round 3 - knit
round 4 - knit

Once the hat was six inches tall, the stitches were decreased as follows;
round 1 - (k10, k2 tog) 6 times - 66 stitches
round 2 - knit
round 3 - (k4, k2 tog) 11 times - 55 stitches
round 4 - purl
round 5 - (k3, k2 tog) 11 times - 44 stitches
round 6 - purl
round 7 - (k2, k2 tog) 11 times - 33 stitches
round 8 - purl
round 9 - (k1, k2 tog) 11 times - 22 stitches
round 10 - purl
round 11 (k2 tog) 11 times - 11 stitches

String yarn through remaining stitches and close up hat. Weave lose yarn ends into hat.


* I did not receive any compensation for this recommendation. I'm just a homeschooling mom who has found many products that I like. If you're interested in the products I recommend on this blog I want to make it easy for you to find them. 
** I am an Amazon associate and receive a small portion of the sales on orders made after clicking in from this site, which I promptly spend on homeschooling books and supplies for my children.

Free Felted Slipper Pattern

My 8 year old knitted and felted her own slippers.

Creating felted slippers is an excellent beginning knitting project because it is so simple. The trick is finding a pattern. Many books don't have slipper patterns, because they are so simple, but the Nic Nac Noo website does have an excellent pattern.

Anyone who has washed a wool sweater in the machine has learned the hard way that wool turns into felt naturally. These slippers take advantage of that natural phenomenon of wool. They are knit with large needles and before they are felted, look like they would be too large for a giant. After agitation in soapy water for 20 minutes or so, the can shrink to whatever size you need.

My daughter began with #10 needles and chunky wool yarn. She cast on 30 stitches and knit 28 rows in stockinette stitch. Then she added two stitches, joined the work into the round and continued to knit 22 rounds in stockinette stitch. Finally she decreased by knitting several rounds of knit 2 together four times in each round until there were only 2 stitches left. I didn't get any photos of my daughters pre-felted slippers, but there are plenty on the web link above along with detailed instructions with photos.

Next a buck was filled with warm water and a little soap.

The slippers were kneeded like bread.

Until they shrank to kid-sized slippers.

Then they were set by the heater to dry and left alone so they would retain the shape desired.

She finished this simple knitting/felting project in less than a week. I would recommend it for any beginning knitter.


Check out these great blogs full of educational activity ideas.

Sideways Chunky Yarn Cable Knit Hat

Chunky yarn is a great way to knit hats really fast. This sideways cable knit hat was created using #10-16 circular needles. Inspired by the book One-Skein Wonders, I modified the pattern slightly to make a smaller hat.

It was a very different hat to knit as first a 20 inch long six inch wide rectangle was knit and then bound off. Next, 72 stitches were picked up and knit along the top edge of the hat. Instead of adding an additional 1.5 inches in height to the hat as the pattern suggested, I began decreasing right away. My hat was already 6 inches tall and another 1.5 inches would have made it way too big.

My decrease plan was as follows:
P1 (P8, P2 tog) 7x, P1
K1 (K2 tog, K7) 7x, k1
P1 (P6, P2 tog) 7x, P1
K1 (K2 tog, K5) 7x, k1
P1 (P4, P2 tog) 7x, P1
K1 (K2 tog, K3) 7x, k1
P1 (P2, P2 tog) 7x, P1
K1 (K1 tog, K7) 7x, k1
P1 ( P2 tog) 7x, P1


In addition, the pattern called for an additional 1 inch brim to be knitted by picking up stitches around the base of the hat. I skipped this part as well, as the hat was the perfect size.


Once the hat was sewn up the back it measured 20 inches around and 8 inches high. It is thick and warm.


* I did not receive any compensation for this recommendation. I'm just a homeschooling mom who has found many products that I like. If you're interested in the products I recommend on this blog I want to make it easy for you to find them. 
** I am an Amazon associate and receive a small portion of the sales on orders made after clicking in from this site, which I promptly spend on homeschooling books and supplies for my children.

Custom Knit American Baby Hats

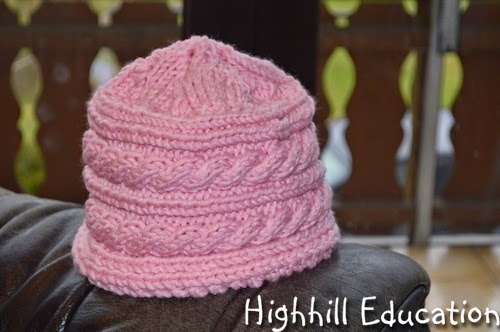
I created two very different red, white and blue baby hats.

The patterns were created using stitches detailed in All about Knitting. The first hat was very simple and a joy to knit. The second hat was difficult and I couldn't wait to finish.

The stitch used in this hat is called Three Color Tweed. It was created by knitting two stitches and then slipping one. In some rows the yarn was held in front of the slipped stitches and in other rows the yarn was held in the back of the slipped stitches. In addition, the stitches were offset in each row so that some were knit 2, slip 1 and other rows were knit 1, slip 1, knit 1. Since each row was knit using only one color the hat progressed rather quickly.

Here's the pattern:
sport weight yarn, #4 round needles
Cast on 120 stitches
place stitch marker and join into a circle
Row Color
1-B-knit
2-W-sl 1,k2 *sl 1 wyib, k2* k1
3-W-k3 *sl 1 wyif, k2* k1
4-R- *k2, sl 1 wyib*k1
5-R-k1 *sl 1 wyif, k2*
6-B-k1 *sl 1 wyib, k2*
7-B- *k2, sl 1 wyif* K1
repeat rows 2-7 until hat is 5.5 inches tall

decrease
beginning on row
7 - B-(*k2,sl 1 wyif* 3 times, k2 tog, sl 1 wyif - place a stitch marker) repeat until round is complete
1 - W- (*sl 1 wyib, k2* 2 times, k2 tog) repeat until round is complete
2 - W- follow pattern
3 - R- (*k2, sl 1 wyib* 2 times, k1, k2 tog, sl 1 wyib) repeat
4 - R- (k1 *sl 1 wyif, k2* 2 times, k2 tog) repeat
5 - B- (k1 *sl 1 wyib, k2* sl 1 wyib, k1, k2 tog) repeat 
6 - B- (k2, sl 1 wyif, k1, k2 tog, sl 1 wyif) repeat

slip yarn through remaining stitches and weave in loose yarn ends


wyib (with yarn in back)
wyif (with yarn in front)
*repeat sections within stars*


This hat was created with a combination of knit twill stitches, knit cable stitches and purl stitches. Since at the bottom of the hat three colors were used in one row, it was extremely difficult. All of the white stitches were purled, all of the blue and red were knit throughout the entire hat. The red stitches were created using a crossed rib stitch which means when there were two stitches together, the second one was knit, then the first and they were slipped off the needle together. I really enjoyed the cross stitch rib, but cabling the blue stitches was no fun at all. Therefore, after a while, the hat was reduced to two colors.

Creating unique patterns is a lot of fun. Sometimes it works well, and other time not so well. Have you created your own knitting patterns? How has it worked?


Check out these great blogs full of educational activity ideas.

* I did not receive any compensation for this recommendation. I'm just a homeschooling mom who has found many products that I like. If you're interested in the products I recommend on this blog I want to make it easy for you to find them. 
** I am an Amazon associate and receive a small portion of the sales on orders made after clicking in from this site, which I promptly spend on homeschooling books and supplies for my children. 

Flowery Knit Hats

My mother knitted these flowery hats for the girls.

Although they appear complicated, they are actually basic hats adorned with knitted flowers. The flowers were created by knitting small rectangles and then rolling them into a coil. The leaves are slightly tapered rectangles.


Since this hat had so many strings coming inside when tying the flowers on, a small circle was knitted inside the hat to cover them. I love the way embellishing basic hats and other items can completely change the look.

What have you embellished? Do you have a favorite knit flower book or embellishing book? If you do please leave me a comment.


Check out these great blogs full of educational activity ideas. 

Knitting verses Crochet - Hats

I learned to crochet by making slouchy beanie hats. My first crochet project was a Boshi crocheted hat. After that I was hooked and had a great desire to learn more about the secrets of crochet.

The main reason I was hooked so fast on crochet was the speed at which my first hat was completed. The patterned called for a large hook and worsted/chunky yarn, thereby enabling me to whip through the hat in less than eight hours.

My plan for learning more was simple. I purchased two crochet hat books; Quick & Simple Crochet Hats: 8 Designs from Up-and-Coming Designers!, and Crochet Celebrity Slouchy Beanies for the Family (Leisure Arts #75358), picked out a few patterns and started crocheting.

Knit Hat
I've been knitting for seven years. I love it! Depending on yarn and needle size projects can take months or be finished in a few days. The hat above was knit using DK weight yarn and #5 needles. I created my own pattern to construct this hat.

cast on 128 stitches
k2, p2 for one inch
increase to 195 stitches by knitting one stitch in the front and one stitch in the back in every third stitch
knit for 3.5 inches
decrease over 24 rounds:
k11, k2 tog
knit
k10, k2 tog
knit
k9, k2 tog
knit
and so on until there are only a few stitches left on the needles

thread yarn through remaining stitches and bind off
weave in loose ends
*change to double point needles when stitches become too tight

It came out nice but took months to complete because I used small needles and thin yarn, and I don't have that much crafting time.

Crochet Hats

Learning to crochet went fairly quickly once I understood the basic stitches. A few times I got stuck, but the tutorials on youtube quickly came to the rescue.

Following the patterns in the new crochet books I quickly learned that I crochet loose, just like I knit. Therefore, it was necessary to make some adjustments in order for the hats to fit. The solution was to remove several holes from the crochet project. Although there are other methods, this was done simply by skipping holes when crocheting around the hat.

Each new project taught me a new stitch or two.

The above hat used a V-stitch constructed from two double crochet stitches placed in the same hole.

Crocheting the turnbuckle cap incorporated bobbles which were constructed by chaining a few stitches in the round and then single crocheting around the chain several times turning the work.

Knitting VS Crochet

I think it's interesting how similar style hats can be created by both knitting and crochet, but the most interesting thing about knitting verses crochet is the stitches.

In knitting there are two basic stitches: Knit and Purl stitch. Aside from casting on and binding off, everything is a variation of those two stitches.

In crochet the basic stitches are:
chain
slip stitch
single crochet
double crochet
triple crochet
half-double crochet

Like knitting, the designs are all created with variations of the basic stitches.


* I did not receive any compensation for this recommendation. I'm just a homeschooling mom who has found many products that I like. If you're interested in the products I recommend on this blog I want to make it easy for you to find them. 
** I am an Amazon associate and receive a small portion of the sales on orders made after clicking in from this site, which I promptly spend on homeschooling books and supplies for my children.

Top Down Knit Sweater with Needle Felted Hedgehog

I knitted a plain sweater from the top down and then decorated it with a needle felted hedgehog and three trees.

I've knit plenty of sweaters in the past, but this one was simple, quick and very enjoyable to knit. It's the first one I've created starting at the top. It was knit in the round, and there were no seams, so when the knitting was finished, so was the sweater.
 
The pattern came from the book Top Down for Toddlers: No-sew Knitting. Several years ago my mother gave my son a sweater from this book and the neck was very wide. For this reason, since I knit loosely, and I didn't have the exact yarn called for, several modifications to the directions were made. The directions said to cast on between 72 and 96 stitches for the neck depending on the size (1 year to 6 year). Making the sweater for a 7 year old, I only cast on 66 stitches.

The body section normally contains between 208 and 264 stitches again depending on the size. For my altered version of the pattern, 232 stitches were used. The sleeves in the book call for between 48 to 65 stitches, and I used 54 reducing to 40 over the length of the arm.

It's always a trick getting the stitch gauge to match the pattern, so I was excited that it worked so well.

Needle Felted Hedgehog

The book FELT Easy and Fun contains several projects for needle felting animals along with directions. My daughter loves hedgehogs, and this book actually had one. Using the picture as a guide, fiber was layered and poked with a long needle on top of a foam block until it stuck together and looked like trees and a hedgehog. Then the figures were placed on top of the sweater and the foam block was placed inside the sweater. The poking continued until the creatures stuck to the sweater. The needle can be seen sticking in the tree on the left in the above photo.


Needle felting is actually quite easy. My daughter did it at four years old. Here's a post with links to an online-store where I have purchased many supplies. Some needle felters purchase sweaters from thrift stores and jazz them up with fiber. I think this is a great project idea both for me and for the kids.


* I did not receive any compensation for this recommendation. I'm just a homeschooling mom who has found many products that I like. If you're interested in the products I recommend on this blog I want to make it easy for you to find them. 
** I am an Amazon associate and receive a small portion of the sales on orders made after clicking in from this site, which I promptly spend on homeschooling books and supplies for my children.

Home Spun Knitted Hats

These home spun knitted hats were created from dyed merino wool near a worsted weight and knitted on size 10.5 needles.

Finding knitting projects simple enough for kids and entertaining enough to motivate them can be a challenge. This simple hat fits the bill. Although I spun the wool for the hat, purchased yarn would work just as well.

Spinning wool into yarn and knitting are two of my favorite hobbies. I learned to spin when living in Colorado after visiting a history event which had a spinning demonstration. It just so happened a lady who lived a few miles away was willing to teach my daughter who was five years old at the time.

We spent three 30 minute sessions with her learning to spin on a hand-held spindle, and then bought ourselves a wheel. It is a very rewarding and creative hobby.

Just as knitters have a natural tendency to knit loosely or pull the stitches very tightly, spinners have a tendency to spin thick yarn, or thin yarn. The yarn I make tends to be close to a worsted weight yarn and I knit loosely.

The yarn for these hats was created by spinning balls of solid colors (lavender, aqua, raspberry, gold and pink - magenta, purple, lavender and aqua) and then spinning the balls together into plied yarn which contained two strands of different colors.

The hat pattern:Cast on 60 stitches and join into the round
k1, p1 for 1 inch
knit 6.5 inches then decrease as follows
k8, k2tog - 54 stitches
k7, k2tog - 48 stitches
k6, k2tog - 42 stitches
k5, k2tog - 36 stitches
k4, k2tog - 30 stitches
k3, k2tog - 24 stitches
k2, k2tog - 18 stitches
k1, k2tog - 12 stitches
k2tog - 6 stitches
string the yarn through remaining loops and tie off hat

Hat 1:
Topper Loops:

To create the loops on top of the hat five 4" snakes were created. By casting on four stitches and pushing the stitches to the opposite end of the double pointed needle and knitting, instead of knitting back and forth, a small circular tube was created. Each of the tubes were sewn to the top of the hat in a loose pretzel shape securing both ends to the inside of the hat by tying the lead and cast-off yarn pieces together.


Hat 2:
Flower Pattern:
Cast on 6 stitches
*cast off 4 stitches, knit 2
*knit 2, cast on 4 stitches
Repeat two starred rows 15 times
sew the flower into a circle

Flower center
Cast on 3 stitches
knit 3 two rows
knit 3 with tail two rows
cast off and sew into a semi-sphere

Next, the flower was sewn onto the hat and center of the flower was added on top of the flower.


To find more simple knitting projects for kids and beginners, please see our Arts and Crafts page.


Fourth of July Crafts

Last year in June we spent a few minutes browsing Pinterest to get some 4th of July inspiration. The kids all saw different crafts they wanted to complete.

The first was a napkin and silverware holder made from toilet paper tubes and cardboard.


My daughter made a wreath with stars from a paper plate and construction paper.


My oldest decided to knit a red white and blue hedgehog which she named Lava.

My youngest made the hedgehog a matching headdress.

And they made some paper chains.


Related Posts Plugin for WordPress, Blogger...