
Week 1: Mineral Identification
Minerals are the building blocks of rocks like dough, flour and milk are the building blocks of bread. Minerals are made up of elements and have a consistent chemical formula. Therefore, they always contain the same quantities of elements. Rocks, on the other hand, are made up of minerals. The different colors in rocks are usually small quantities of varying minerals.
Watch the following video, A Brief Introduction to Minerals, explaining five criteria used to determine whether or not a rock is a mineral.
Read the mineral identification portion of the book How the Earth Works (How It Works)

You will need some mineral samples to do this activity. Look at the following properties of several different mineral samples.
- Streak Test - What color does the mineral write when scraped on a white tile?
- Specific Gravity - Density of mineral divided by the density of water - The density of water is 1 g/ml^3 at 4 degrees C. To simplify our calculations, we assumed it to be 1 thereby making the specific gravity of the mineral equal to the density in g/m.^3.
- Hardness - Can the following objects scratch the mineral; fingernail-2, bronze coin-3, iron nail-4, glass-5, penknife blade-6, steel file-7, sandpaper-8?
- Acid Test - Does the mineral fizz when a drop of vinegar is dropped on it?
- Color and luster
- Cleavage - Is it flaky? Does it have 90 degree angles, or "rhombic"angles? Is it hexagonal? Is it cubic?

After taking notes on the properties of each mineral try to identify it. Here are a few mineral identification websites
Find Minerals by Name
Common Mineral Flashcards
Search Minerals by Properties
Week 2: Geodes
Geodes are hallow rocks formed underground. When ground water carries dissolved minerals into hallow cavities, geodes can form. The most common elements found in minerals are silicon and oxygen. When they combine with other elements to form minerals they are called silicates. These same minerals, known as quartz, are the most common found inside geodes.
Purchased the Discover with Dr. Cool Explorer Geode Science Kit, Set of 7


Pure quartz is made of silicon and oxygen and is hexagonal in shape. When other minerals combine with the silicon and oxygen of pure quartz, variants of quartz such as orange quartz, which are different colors are formed.
Week 3: Mining and Gemstones
Gemstones are rocks or minerals which have been cut and polished. Many gemstones are used for jewelry and the rarer the mineral, the more valuable the gem.


Gemstone or Mining Field Trip

Searching for stones in newly turned over ground
Take a gemstone or mining field trip depending on what is available in
your local area. If you can visit a mine and take a tour take advantage
of this learning opportunity. Rock and mineral shows travel the country
each year. If there is one coming to a big city near you it would be
another excellent geology field trip opportunity. Otherwise visit a
jewelry store and ask about minerals. If none of these options work for
you bury some fancy rocks in a field, then have the kids dig for the
rocks. Often stones under the ground all look alike. They are not obviously good finds until they are cleaned. Have the kids rinse and polish them until they shine.
Scrub off the mud
Week 4: Crystals
(This project makes beautiful Christmas Ornaments.)
You will need borax, water, empty glass jars, one cup measuring cup, small saucepan (for boiling the water before adding the borax), tablespoon, pipe cleaners, embroidery floss, and craft sticks to complete this project. Visit one of the sites below to get a recipe for growing crystals.
http://www.wdwfanzone.com
http://chemistry.about.com
http://www.scientificamerican.com


Pour one cup of boiling water into a glass jar and stir in three tablespoons of borax until it dissolves. Then soak a pipe cleaner in the mixture for 12 hours. Check in on it a few times by viewing, weighing the pipe cleaner and recording your results.


Using your lab notebook, create a report or project board displaying the results of your crystal growth experiment.

Week 5: The Rock Cycle
Rocks are scientific clues which help us decode the mystery of landforms. They can tell stories about past volcanic activity and whether a landscape was once covered with water. Some rocks are typically found alongside other rocks and knowing which are found together can lead to new discoveries underground.
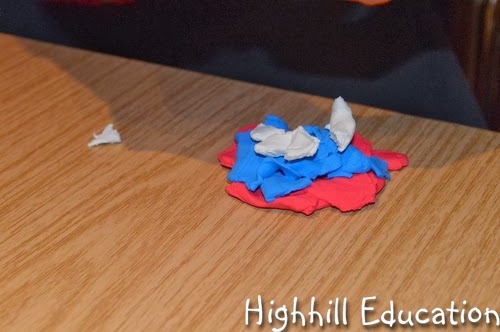
There are three types of rocks: igneous, metamorphic and sedimentary. Through heat, pressure and erosion, each type of rock can be changed into the other two. This weeks geology unit study project is to simulate the rock cycle using Crayola Model Magic.


Week 6: Rock Identification
Rocks are used to build roads, buildings, make glass, and carve. They are set into jewelry, used as game pieces, table tops, and in a variety of other ways. Within the three main categories of rock sedimentary, metamorphic and igneous, rocks can be further divided.
Read the nine step process for further identifying rocks in the book How the Earth Works (How It Works)


Look at the grains within the rock.

Test its hardness, and calculate its density.

Week 7: Formation of Granite
Granite is an igneous rock which forms underground. The bigger the crystals in the granite, the stronger the granite. Some of the hardest granite on Earth is found in Yosemite National Park.
Watch the documentary, How The Earth Was Made - Yosemite. It can be found on youtube or through the History Vault's low cost streaming service. When granite cools slowly, large crystals are formed. In Yosemite, a crack in the surface enabled liquid magma to seep out. The magma kept the cooling granite warm for a longer period of time greatly increasing the cooling time. As it took a long time for the granite to cool, large crystals developed.
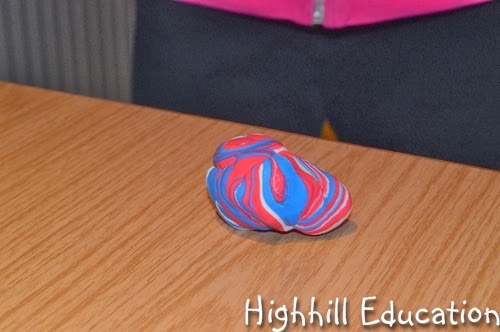
After watching the video, use Crayola Model Magic

Break the dough into small pieces to represent many crystals.

Stick the crystals together to form granite.

Repeat the process with larger crystals to illustrate stronger granite.


No comments:
Post a Comment
Note: Only a member of this blog may post a comment.