Free Earth Science Unit Study - Part 2 - Advanced Mapping
This is a six week advanced mapping unit study perfect for kids in 3rd-5th grades. Before beginning this unit study kids should be familiar with basic maps and map reading. This unit study covers land forms, latitude and longitude, elevation, contour maps, mapping the ocean floor and making a sundial. The lessons are activity intensive but also incorporate books, video documentaries, research and discussions opportunities.
Week 1 - Land Forms
Week 2 - Latitude - Astrolabe
Week 3 - Elevation - Measure a Hill
Week 4 - Contour Maps
Week 5 - Mapping the Ocean Floor
Week 6 - Make a Sundial
Week 1: Land Forms
While some geographic land form terms such as lake and island are part of our everyday vocabulary, others such as atoll, fjord and palisade may seem foreign.
Cape and Bay
Lakes and Archipelago
Peninsula and Gulf
Lake and Island
Strait and Isthmus
Each term above represents a unique land form, and each pair of words indicate land forms where the water and land are opposites. For example, a lake is water surrounded by land and an island is land surrounded by water. Read the book Geography from A to Z: A Picture Glossary (Trophy Picture Books)
Next make a set of land forms you can eat. Select your favorite cookie or recipe where the dough holds its shape when baked, and make or purchase a frosted topping such as icing.
With the dough, place a different land form into each muffin tin.
The above land form is a delta with a river and nearby mountain.
Make an icing to represent water and add the water to the land forms.
Week 2: Latitude
After watching the video and before beginning the project make sure the kids understand degrees. With a protractor under them, have them turn their bodies to face 0 degrees, 90 degrees, 180 degrees and 270 degrees with a little jumping game. Then look at how degrees on a protractor relate to degrees of latitude.
Create dough balls to represent the Earth and use embroidery floss to mark the different latitudes as explained in Janice VanCleave's A+ Projects in Earth Science: Winning Experiments for Science Fairs and Extra Credit
First roll dough into a ball.
Then wrap embroidery floss or dental floss around the ball to represent the equator. Wrap the floss four more time to represent the arctic and antarctic circles, and tropics of cancer and capricorn.
Next, use a protractor, cardboard, straw, scissors, tape and a key chain for a weight to create astrolabes.
The project is very simple and takes less than 30 minutes to complete.
First trace the protractors onto cardboard and cut out. Create a small hole in the center.
Fasten a string to the hole with a weight on the end. Place a straw with a slit on the top for a sight.
Mark the cardboard from 0 to 90 degrees. 0 degrees should be at the bottom and 90 goes near the straw.
To determine latitude, sight the north star through the straw and read the angle where the string crosses the astrolabe. That angle is latitude. Compare your latitude reading with the latitude of your location on the globe.
Week 3: Elevation
Using a level, two old broom handles, scissors, string, permanent marker, ruler and tape make a simple tool used to measure elevation.
Mark the broom handle with measurements as follows.
Stand the two broom handles upright, side-by-side, and mark a 0 at the same height on both handles near the center of the pole. On one of the poles, mark distances of every 5 inches above and below the 0 mark.
On the other pole, tie a string tightly around the pole at the 0 mark and tape it in place so it won't move. Tie the opposite end of a 60 inch long string to the other pole loosely so it can slide up and down.
Go to your hill.
Starting at the bottom of the hill, make the string level by sliding it up or down the pole with the measurement marks. Record the height on the marked pole and record it in a table as interval 1. Then place the downhill pole at the location of the uphill pole, and bring the uphill pole farther up the hill. Stretch the string taught and level it again. Then record the elevation as interval 2 and repeat the process until the top of the hill is reached.
Returning home and transfer the data points to a graph. Color the graph and notice how it looks like the hill.
Week 4: Contour Maps
Contour maps are valuable navigating tools for hikers and naturalists. The wavy lines indicate elevation and are always closed loops. The video How to Read a Map & Contour Lines explains several unique features of contour maps. For example, when the wavy lines point towards a peak, that is an indication there is a low path such as a stream bed running down the mountain.
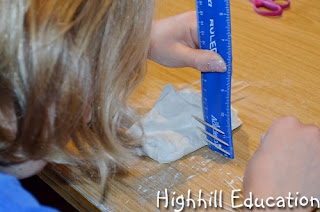
After watching the video create contour maps using clay, toothpicks, rulers and embroidery floss (or dental floss) as described in Janice VanCleave's A+ Projects in Earth Science: Winning Experiments for Science Fairs and Extra Credit
First create an irregular shaped mountain.
Add additional toothpicks every centimeter of height in four lines running down the mountain.
Place the mountains on a piece of paper and use a pencil to trace around the base. Mark the locations of the four columns of toothpicks on the paper.
Wrap floss around the mountain and pull the ends together just under the bottom row of toothpicks to slice the bottom layer off the mountain. Place the mountain on the paper lining up the toothpick marks with the mountain. Trace around the base of the mountain to draw a contour line. Repeat the process until the top of the mountain is reached.
Looking at the above contour map, several features of the mountain can be seen. There are two peaks indicated by the two small circles. The slope on the left side is gradual which is indicated by the larger spaces between the contour lines. There is a valley between the two peaks indicated by the contour lines pointing toward the peaks.
Week 5: Map the Ocean Floor
Did you know that cold water corals dominate much of the ocean floor and they sometimes build colonies taller than skyscrapers? During the last century scientists have gained vast insight into the ocean. Major advances in technology such as sonar and submersible vehicles have led to many discoveries. Unknown creatures have been identified, much of the floor has been mapped and soil boring samples have helped to unlock the mysteries of how certain underwater topology was created.
Before sonar technology, oceanographers first mapped the ocean floor in certain locations by lowering a rope into the water. This painstaking method is explained well in the beginning of How The Earth Was Made, The Deepest Point. The How the Earth was Made series of videos is available on the History Vault. A low cost streaming service from the History Channel.
Ocean Floor Mapping Activity
Create a sketch of the floor of a model ocean.
Create an ocean floor by placing a few objects in the bottom of a cardboard box.
Then fill the box with packaging peanuts "water".
Create a tool for measuring depth. One option is to use a butter knife, string and tape to hold the string in place on the knife.
Create a grid above the water and draw a proportional grid on graph paper.
Measure the depth at each crossing point on the gird.
Color the grid blending different colors for various measured depths.
Or draw concentric circles to represent a data depth point. Add more circles for deeper water.
Week 6: Sundial
A time when the feudal system with kings and queens, knights and ladies, craftsmen, servants and peasants determined status, life was very different than today. Few people could read and write. Girls learned to cook and sing, and were married around 12 years old. Boys learned the skills of their fathers. People dumped chamber pots into the streets and slept together on beds of hay. Bath water was shared between family members and blood letting was a common medical procedure. The maypole and egg dances were performed during special events and children played games such as hoops, bad mitten, chess and marbles. Early geared clocks had been invented, but only the very rich could afford them. Most people kept time with sundials.Construct a sun dial using a paper plate and a straw. To have a successful sundial project the following items are key.
- A dry sunny day
- A spot which receives sun most of the day
- Rocks, duct tape or some other method to prevent the sundial from flying away in the wind
- An alarm to go off every hour as a reminder to mark the shadow on the sundial
To make sundials use a thumb tack and pencil to pierce a small hole in the center of a paper plate. Next a insert straw into the hole and dab with glue to secure into place.
Place the sundials outside in a sunny spot and secure in place with rocks. At each hour of the day mark a line and label to mark the time.
The numbers will not be evenly spaced around the plate like a clock. They will vary according to the angle of the sun and your location on Earth. If they are evenly spaced the result will be a sundial which does not work.
Depending on the location of the sundial, the numbers will end up being spaced in more of a semi-circle shape.


No comments:
Post a Comment
Note: Only a member of this blog may post a comment.