Materials:
Circle Cutter or Stencil
Circle Cutter or Stencil
Paints (we used tempera, but I think many types will work)
Ruler
Construction Paper
White Paper
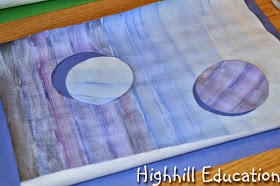
Next, we each chose one color to paint with. The goal was to paint the stripes beginning with the lightest, in such a way that each stripe would be slightly darker than the previous stripe.
Although we mixed our color with white for the lightest shade and black for the shades past the center, I'm not sure this was the best approach. It would have been better to let our pure color be the darkest stripe and to begin with white adding a little more of the color with each strip. All the paintings look good from the lightest to the middle, but once the black was added, they stripes began to look dirty instead of darker.
After learning a lot about making progressively darker stripes, we mounted our paintings onto construction paper.
Before the paintings were secured to the paper, two circles were cut; one from each end of the painting.
After the paper was mounted, the circles were glued down leaving a little gap to serve as a shadow.
This was a fun project, but needs to be repeated in the future with different paints and no black for better results.


This is a really cool project! I love the effect. We worked a little on shades this week and plan to do more next week.
ReplyDeleteI have never seen this done before. It's quite cool. Think I'll add it to our list to try this term, Thanks for sharing.
ReplyDeleteYet another of your so-simple-but-absolutely-brilliant ideas! Will definitely be doing this one. Thanks.
ReplyDeleteYet another of your so-simple-but-absolutely-brilliant ideas! Will definitely be doing this one. Thanks.
ReplyDelete