This is a nine week free chemistry unit study perfect for kids in grades 3rd-5th which can be adapted to work for older or younger children. Several of the lesson weeks can be expanded to make this chemistry unit cover the entire year. It explores several different chemistry principles through hands-on experiments which can be completed with materials commonly found at home.
Week 1: Density of Solids
Density is mass divided by volume - d=m/V - It's simple to measure and calculate. Determine the density of pennies, dry beans, glass and an orange.
First weigh the objects to determine their mass in grams. Then
submerge in water to determine their volume in milliliters
(ml). Measure the volume of liquid alone, and then with the solid.
Subtract the two numbers to determine the volume of the solid
alone. One milliliter is equal to one cubic centimeter. The density of
water is one g/cm^3. Next divide the mass by volume.
Now the age old question of "What weighs more a
pound of cotton or a pound of bricks?" has a little more meaning.
Week 2: Density of Liquids
To calculate density first measure the quantity of a liquid (ml).
Next weigh the liquid (grams).
Then divide to get grams/ml.
Water, dish soap and corn syrup are good liquids to try. Which is the most dense?
Week 3: Cleaning Old Coins
Not all pennies are created equal. Older pennies contain more copper than newer pennies. In order for the penny composition to not have an effect on the experiment separate the pennies. Check the date. Pennies older than 1982 have a copper composition of at least 95% copper.
Watch the video Clean Pennies with Vinegar.
Clean a few pennies.
Next research other methods for cleaning coins and try them out.
Try cleaning dirty coins with a toothbrush, soap, water and hydrogen peroxide.
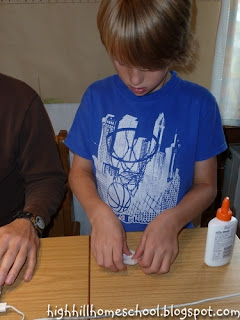
Glue can be used to clean coins.
When the glue dries, open it and peel off the glue.
Repeat the process several times.
Freezing can be used to clean coins. Freeze the coin with a little water. Once frozen knock off the ice and dirt and debris may come off with the ice.
Week 4: Experiment with Mylar Balloons
This is a fun experiment to try a few days after a birthday party.
Hold the balloon which no longer floats in the air over a heater or use a hair dryer to warm the helium inside the balloon.
Bring the balloon outdoors and release it. Tie a string to the balloon and hold the string if you don't want to loose the balloon.
It should float up into the air and then come down once the air cools. Wind could take the balloon far away and it may not be recoverable. If your child is young, you may want to try this experiment indoors.
Week 5: Get Iron from Breakfast Cereal
Crush breakfast cereal into fine grains,
add water,
pour the concoction into a plastic bag,
drag a strong magnet over the plastic bag. Iron can be collected. The dark spot in the upper left hand corner of the bag is a small glob of iron.
Week 6: Rotting Apples
Repeat the experiment a second week, but use different liquids as preservatives. Try placing the apples in corn syrup, apple juice, oil and plain water. Note the smell of fermentation.
Week 7: Peeling Eggs
Take a little off the top of the egg.
Peel the bottom.
Then blow.
The egg pops out the bottom.
Eggs that are difficult to peel have low PH values and are therefore acidic. As eggs age, they loose carbon dioxide and become less acidic and thus easier to peel. Some eggs are coated with oil during the cleaning process which inhibits the escape of the carbon dioxide making them difficult to peel.
7-10 days after the egg has been laid is the optimal time to peel it. Adding a spoon full of baking soda to the cooking water will raise the PH value making the eggs easier to peel.
For this egg blowing method to work the eggs needed to have higher PH values.
Week 8: Candy Making
Making candy is a science. Just melting chocolate involves measuring temperature and a precise heating and cooling cycle. If proper tempering isn't done, chocolate can burn or end up with unsightly white streaks. I liken it to the science of metallurgy where metals are combined, heated and cooled to precise temperatures in order to achieve desired characteristics. Candy making for science can last one or several weeks.
Although there are several science candy making kits on the market, it is easy and economical to put together your own. Reviews of such kits commonly state there really isn't much inside the boxes. I recommend the book Candy Making book by Autumn Carpenter and purchasing supplies from a grocery or candy making store.
Begin with simply dipping treats into chocolate and making clusters. The progress to candy coatings, flavorings, peppermint crunch and more.
Week 9: Bread Making
Follow the book Baking Artisan Bread by Ciril Hitz as a guide. The first section of the book lightly explains the science of baking and goes in-depth into the differences in ingredients. The author recommends weighing ingredients instead of measuring with cups and spoons as it is a much more accurate method for proper proportions.
After the introduction section, the book contains ten main recipes for various types of bread such as brioche, baguette, bagels, and whole wheat. Each main recipe can be altered to make many more breads. Some breads can be made in one day, while croissants take three days to prepare.


_wm.JPG)
_wm.JPG)


No comments:
Post a Comment
Note: Only a member of this blog may post a comment.